Wednesday, April 22, 2015

It's A Girl!!!! Baby Shower

Well, thanks to my need to pinch pennies on everything I do, we pulled off a baby shower for my son & daughter-in-law without spending a bunch!  And thanks to Pinterest, every cheapskate's bible, we did most everything ourselves.
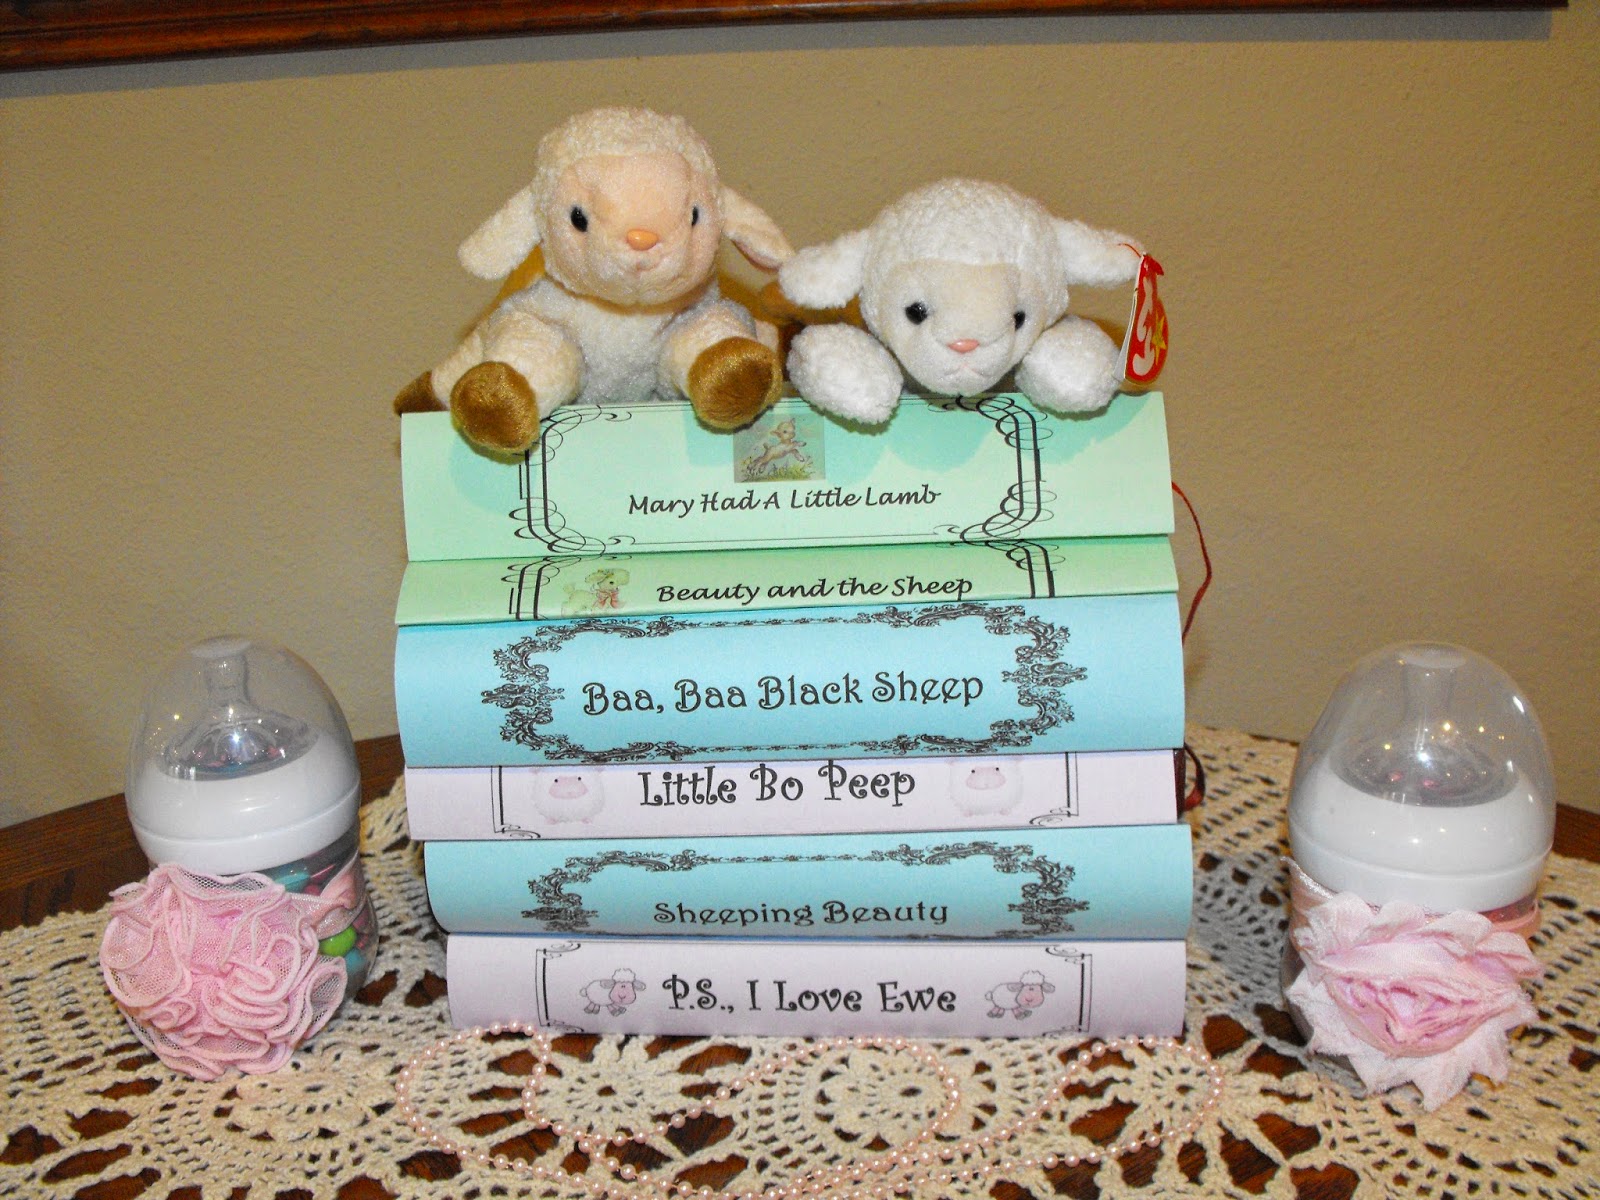


Our shower was sheep-themed.  I printed book binding titles that were sheep-related on card stock and wrapped around old books for a display. I made a diaper cake - these are surprisingly easy to make - and used hats, headbands, washcloths and socks rolled into flowers for accents. Then my daughter and I tried our hand at dipping marshmallows into candy melts and then into sprinkles, and they turned out great! We strung a clothesline and hung outfits from it. Instead of a guest book, I cut out onesie shapes with my Cricut Explore and suspended on some string in an empty picture frame with tiny clothespins. One game we played was "The Price Is Right", where guests had to match prices with baby products ( I even managed to record the theme song on my phone for an authentic feel while guests played!) And due to all the chaos that goes with being pregnant, I went ahead and printed thank you cards we handed out to guests as their gift was opened.  I made a cute sign from some scrap 1x12 pine.  Painted pink, and again, using my Cricut, I cut out letters from vinyl and removed the letters so I was left with a sticky "stencil" and painted the words on.  I found some cute vintage sheep pictures and printed them out on tissue paper and decoupaged them on. We also had guests write funny sayings on diapers for those "middle-of-the-night" diaper changes!

And the kids wanted big letters with the baby's name for her room, so I went ahead and purchased and painted them and used for decoration - very cute!  I purchased the big letters from Hobby Lobby and painted white, then glued sawtooth hangers on each letter.  The name "taylor" I purchased from woodenletters.net for a very reasonable price, and painted pink. 
Nearly all the decorations were usable items - diapers, washcloths, outfits, bath products, etc.  All in all, I'd say it was a total success!

Friday, January 16, 2015

Shabby Memo Boards


These were so fun to make!  I scrounged up a couple of picture frames with ugly pictures and only kept the frames.  I painted them fun colors, and stapled chicken wire on the back side.  Then I painted some wooden clothes pins in coordinating colors.  These are great for notes, photos, jewelry, or whatever!

Thursday, October 30, 2014

Pallets at a Wedding? Yes, Please!!


You will notice this date is a little in the future - when you are a true do-it-yourselfer and a cheapskate, you have to start early!!!
I got a pallet FREE (makes my heart skip a beat when I hear that word!), and painted it white.  Then dug through my mish-mosh of stencils and put the info on it.  We plan to set this out by the turn-off going to the wedding. I know this isn't everyone's style, but for a shabby, rustic wedding,this just fits!

Chippy Door Gets New Life!

I am sure there is something seriously wrong with me, but I just LOVE old chippy worn out stuff!  My aunt gave me this old door they found in their basement. I used some old barnwood (thanks, again, to my aunt!) to make a top and found some old turned legs that I painted white.  I love this.  It would make a great entry  table, or would be nice to fill a corner that needed a little brightening!


Wednesday, September 10, 2014

DIY Fabric Flowers

My new favorite way to make shabby fabric flowers!!!!  My son is getting married, and we are making what we can to save money.  I think these are just beautiful, and super-easy to make.  They go pretty fast, and would be great "assembly-line" projects.
You cut squares of fabric, lace, burlap, whatever, some about 3-4" and some about 2". Then you fold in half, just slightly off center and fold in have again, just slightly off center, and add a dab of hot glue to secure your square.  Cut a circle out of cardboard, whatever size you want - these range from 2"-4" diameter.  I punched 2 holes in cardboard and threaded some jute through so we could hang later if we wanted. If not, I will just snip off the jute.  I then cut a matching circle of cardstock and hot glued to the back.  Then begin assembling the front flower.  Place a dab of hot glue about 1/2" from edge of circle and place your folded square.  Continue in a circle until you have covered the outside.  Repeat, working to the center with different fabric, and when done, hot glue a bead, button, or whatever you have to the center. 

Friday, May 23, 2014

Vintage Industrial Refurbished Chair


I went to lunch one day, and noticed my son-in-law's truck outside, with this grubby chair in the back.  When I asked about it, he said he was on his way to the dump.  Of course, I couldn't let that happen!  I cleaned it up a bit, painted it with hammered black rustoleum, and recovered the cushions with some cute printed burlap.  I think it's adorable! 

Garden Rocker


I love this!  I found this child's rocker at a yard sale for $1.00.  I painted it with ivory rustoleum to withstand the elements.  Then I decoupaged on vintage seed packet pictures, added a galvanized birdhouse to the top and it now graces my mom's patio.