Tuesday, October 6, 2015

DIY 80s Birthday Party

Well, we have pulled off another DIY birthday party - this time with the 80's theme.  And thanks to my "cheapskate" inner being, total decor, cake and drinks was around $35.00. 
I downloaded various 80's images from the internet of arcade games and screens and printed them off to have laying around.  I used my Cricut to cut out pacman and ghost shapes, as well as a few 80's slang phrases. I scrounged up some old cassette tapes and spray painted them red and yellow and had some on the cake table, and other places.  I cut out two guitar shapes from corrugated cardboard and painted them and had my dad draw the strings and frets on them.  The cake was pacman.  I made a sheet cake and cut it into a circle, then removed a pie-shaped wedge for the mouth.  The cupcakes are to look like the "food" pacman ate on the arcade game. A little yellow icing and a single black candy melt, and voila!
For the tablecloth, I used a Dollar Store black disposable tablecloth, and purchased square napkins in bright colors and used glue dots to adhere to the front for a rubix cube look.  Since I am no good at writing with icig, I printed a sign to display behind the cake with the "Happy Birthday" on it.
I used beads from leftover projects to create several really gaudy necklaces for the girls to wear. I scored 144 jelly bracelets off ebay for like $2.00.  A package of hideous blue sparkly eye shadow completed the ensembles!  And I also got two disco light bulbs from ebay for around $6 each to add to the ambiance.  I managed to find submersible, battery-operated lights (again from ebay) and added them to our punch!


Friday, September 25, 2015

More DIY Halloween Decor Potion Bottle

So, here is latest creation!  I love these because they can be done with nearly any type of bottle or jar, and they are super-cheap to make!

This was made with a glass bottle, although I think I would prefer plastic.  You can use an empty alcohol bottle, vitamin bottle, etc.  I drew my letters and designs on the bottle with marker, then traced with a hot glue gun.  Once cooled,  I painted the entire thing black with acrylic paint, being sure to get into all the crevices of the letters and designs.  After that, it's whatever floats your boat in colors.  I had some brown, orange and tan acrylic paint I just dobbed around to give it an old look.  Then I used a light tan/yellow to highlight the raised parts of the glue design.  Once dry, I covered with a coat of Modpodge and hot-glued a little jute around the top.
Cool, one-of-a-kind decor at hardly any cost to me!

Thursday, September 24, 2015

DIY Fun Halloween Decor

Two simple and fun Halloween projects:  Witchy Potion Jars, and Witchy Spell Books

Witchy Potion Jars I made from various old jars I had sitting around, and I used different shapes and sizes.  I downloaded some free printables and printed them on tissue paper.  Grabbed my Modpodge and applied to the jars.  I then took some lengths of jute and hot-glued in different places for one-of-a-kind jars.  These look cute as-is, or you could fill with fall potpourri or colored liquid!


For the Spell Books, I used some yard-sale finds.  You can usually pick up hard-back books for anywhere from .25 to $1.00.  I guessed at the center of the book and opened and kind of smashed it to stay in the open position.  Again, downloaded a few free printables and printed on tissue paper.  I tore the images rather than have a straight cut, and decoupaged them onto both open pages, as well as the front and back cover and binding.  I used a brown scrapbook stamp pad to "scruff" some age around the edges of the pages,and curled the corners of a few pages either side of the center of the book. Once I was happy with the look, I put on like 3-4 coats of Modpodge to every surface, so it would hold the book in an open position.  These look great laying down, or in an easel.  These probably took the most time, because I had to wait for each coat to dry, but they look very unique!


Monday, September 14, 2015

Another DIY Birthday Party - Dinosaurs!!!

This was my grandson's 2nd birthday party.  His mom chose dinosaurs for the theme, so we all put our heads together to make it happen.  And thanks to the internet and Pinterest, we were able to do most things ourselves!
This is the coolest!  We saw this on the internet and knew we needed it!  My mom and dad cut this out of cardboard and painted it,and then attached a couple of pieces of wood to the back so it would stand up. We used it for a ball toss, and then had kids stick their heads in the hole for a neat picture.
We had the cake made by a local bakery, and I made the cupcakes - frosted with chocolate icing and sprinkled with crushed chocolate cookies, topped with dinosaurs and a couple of jelly beans for "dinosaur nests".


We had pretzels for "dinosaur bones" and bugles for "dinosaur toenails".  Our green punch was called "swamp water".
We had a roll of painter's paper that we scrunched up and wrapped ivy garland around and used for hanging decor as well as table centerpieces.
And the hit of the party, the "Dino Dig"!  We lined a small plastic pool with a brown sheet and filled with sand. Then buried toy dinosaur skeletons and bones for the kids to dig up.  Of course, they got to take their buckets and "findings" home with them.
I made dinosaur soap to put in their treat bags.  Melted a little glycerin soap base, added a dash of fragrance and set the dinosaurs in!

All in all, it was a great success!


Wednesday, April 22, 2015

It's A Girl!!!! Baby Shower

Well, thanks to my need to pinch pennies on everything I do, we pulled off a baby shower for my son & daughter-in-law without spending a bunch!  And thanks to Pinterest, every cheapskate's bible, we did most everything ourselves.


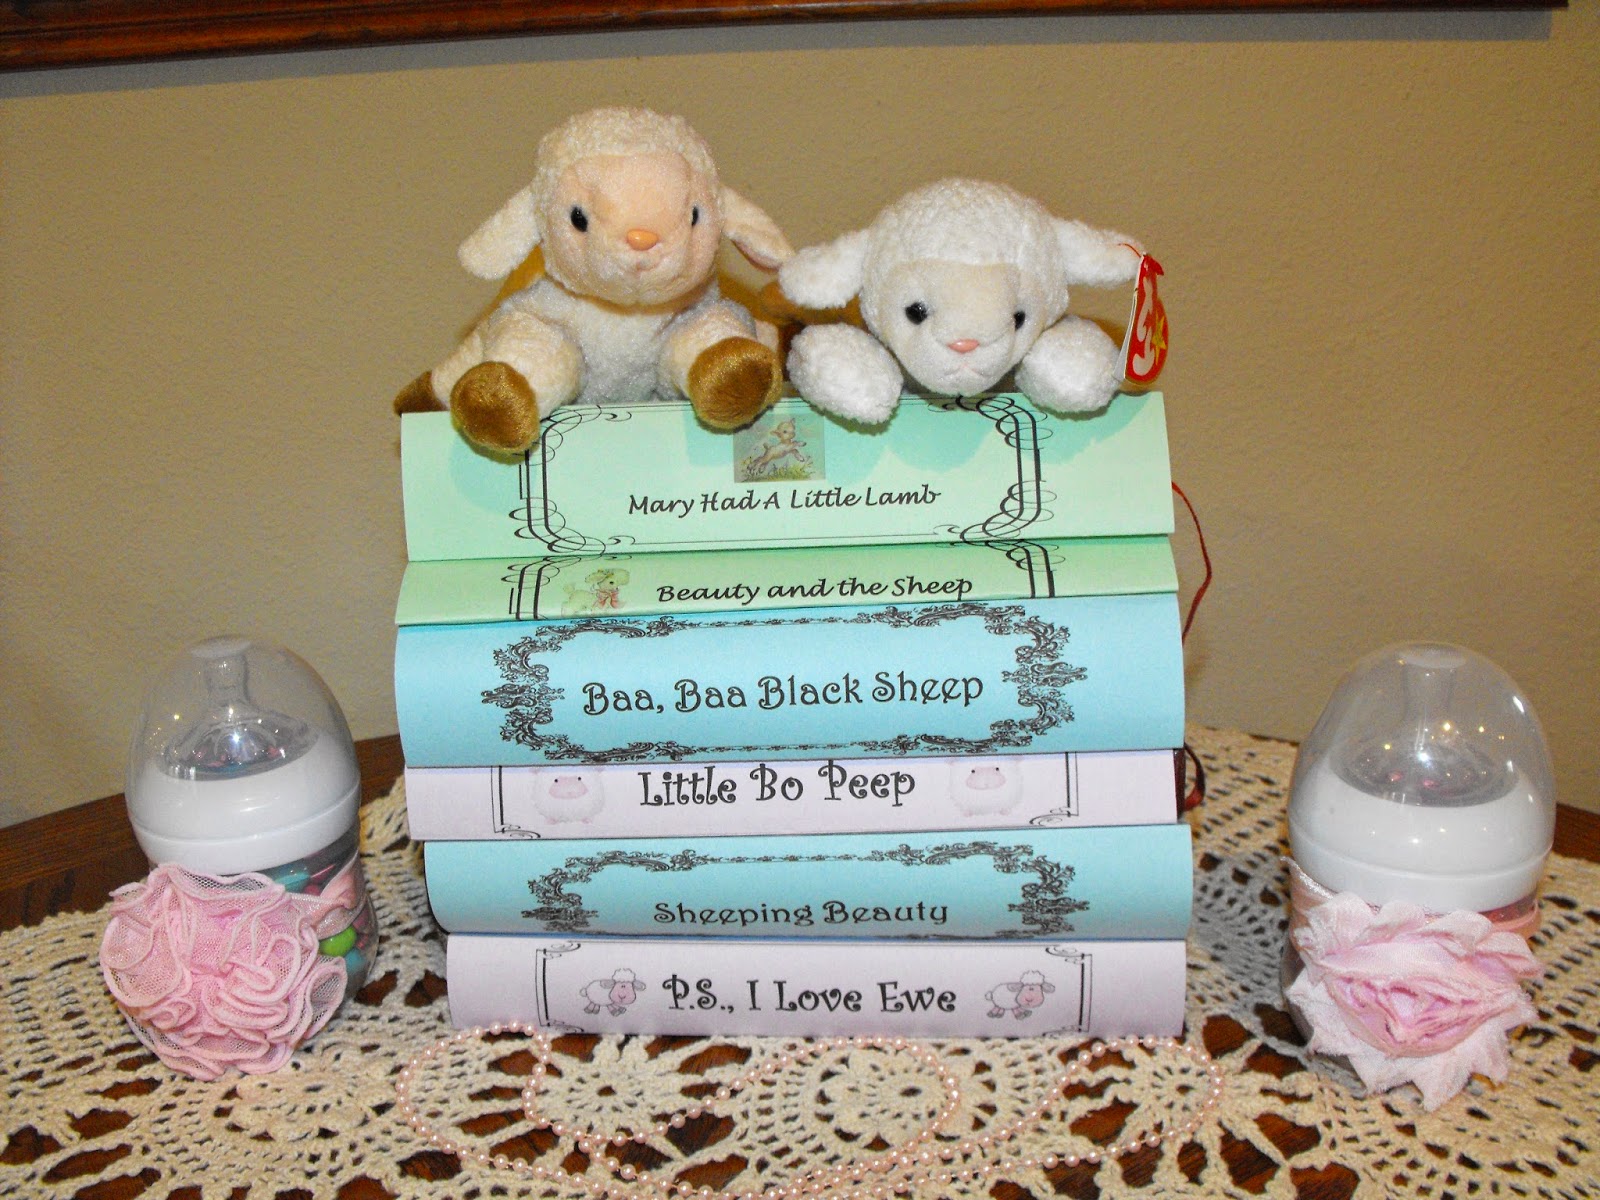
Our shower was sheep-themed.  I printed book binding titles that were sheep-related on card stock and wrapped around old books for a display. I made a diaper cake - these are surprisingly easy to make - and used hats, headbands, washcloths and socks rolled into flowers for accents. Then my daughter and I tried our hand at dipping marshmallows into candy melts and then into sprinkles, and they turned out great! We strung a clothesline and hung outfits from it. Instead of a guest book, I cut out onesie shapes with my Cricut Explore and suspended on some string in an empty picture frame with tiny clothespins. One game we played was "The Price Is Right", where guests had to match prices with baby products ( I even managed to record the theme song on my phone for an authentic feel while guests played!) And due to all the chaos that goes with being pregnant, I went ahead and printed thank you cards we handed out to guests as their gift was opened.  I made a cute sign from some scrap 1x12 pine.  Painted pink, and again, using my Cricut, I cut out letters from vinyl and removed the letters so I was left with a sticky "stencil" and painted the words on.  I found some cute vintage sheep pictures and printed them out on tissue paper and decoupaged them on. We also had guests write funny sayings on diapers for those "middle-of-the-night" diaper changes!

And the kids wanted big letters with the baby's name for her room, so I went ahead and purchased and painted them and used for decoration - very cute!  I purchased the big letters from Hobby Lobby and painted white, then glued sawtooth hangers on each letter.  The name "taylor" I purchased from woodenletters.net for a very reasonable price, and painted pink. 
Nearly all the decorations were usable items - diapers, washcloths, outfits, bath products, etc.  All in all, I'd say it was a total success!

Friday, January 16, 2015

Shabby Memo Boards


These were so fun to make!  I scrounged up a couple of picture frames with ugly pictures and only kept the frames.  I painted them fun colors, and stapled chicken wire on the back side.  Then I painted some wooden clothes pins in coordinating colors.  These are great for notes, photos, jewelry, or whatever!

Thursday, October 30, 2014

Pallets at a Wedding? Yes, Please!!


You will notice this date is a little in the future - when you are a true do-it-yourselfer and a cheapskate, you have to start early!!!
I got a pallet FREE (makes my heart skip a beat when I hear that word!), and painted it white.  Then dug through my mish-mosh of stencils and put the info on it.  We plan to set this out by the turn-off going to the wedding. I know this isn't everyone's style, but for a shabby, rustic wedding,this just fits!

Chippy Door Gets New Life!

I am sure there is something seriously wrong with me, but I just LOVE old chippy worn out stuff!  My aunt gave me this old door they found in their basement. I used some old barnwood (thanks, again, to my aunt!) to make a top and found some old turned legs that I painted white.  I love this.  It would make a great entry  table, or would be nice to fill a corner that needed a little brightening!


Wednesday, September 10, 2014

DIY Fabric Flowers

My new favorite way to make shabby fabric flowers!!!!  My son is getting married, and we are making what we can to save money.  I think these are just beautiful, and super-easy to make.  They go pretty fast, and would be great "assembly-line" projects.
You cut squares of fabric, lace, burlap, whatever, some about 3-4" and some about 2". Then you fold in half, just slightly off center and fold in have again, just slightly off center, and add a dab of hot glue to secure your square.  Cut a circle out of cardboard, whatever size you want - these range from 2"-4" diameter.  I punched 2 holes in cardboard and threaded some jute through so we could hang later if we wanted. If not, I will just snip off the jute.  I then cut a matching circle of cardstock and hot glued to the back.  Then begin assembling the front flower.  Place a dab of hot glue about 1/2" from edge of circle and place your folded square.  Continue in a circle until you have covered the outside.  Repeat, working to the center with different fabric, and when done, hot glue a bead, button, or whatever you have to the center. 

Friday, May 23, 2014

Vintage Industrial Refurbished Chair


I went to lunch one day, and noticed my son-in-law's truck outside, with this grubby chair in the back.  When I asked about it, he said he was on his way to the dump.  Of course, I couldn't let that happen!  I cleaned it up a bit, painted it with hammered black rustoleum, and recovered the cushions with some cute printed burlap.  I think it's adorable! 

Garden Rocker


I love this!  I found this child's rocker at a yard sale for $1.00.  I painted it with ivory rustoleum to withstand the elements.  Then I decoupaged on vintage seed packet pictures, added a galvanized birdhouse to the top and it now graces my mom's patio. 

Wednesday, April 16, 2014

Buckets, Buckets!

Who doesn't have some old, dented, rusty buckets sitting around? I decoupaged vintage seed packet images on these.  These will be great as shabby flower pots!  And the rust in the bottom means no drain-hole drilling!

Yardsale Plates Transformed!

I found some clear glass plates in a yardsale, and moved them here and there for a couple of months before I could decide what to do with them. I decoupaged vintage flower pictures and sheetmusic on the back side of them.  The front is still food-safe.  These would be adorable to use for an outdoor tea party!

Thursday, January 23, 2014

New Old Display


This turned out really cute!  I took an old dresser drawer and painted it black.  Then decoupaged some really vintage-looking scrapbook paper on the insides.  I added a wired ribbon through the drawer-pull holes, and hot-glued a few pearl strands to the edges.  Instant display shelf!  Even my mom (who hates old stuff) said she liked it!!

Friday, January 17, 2014

New Baby Room Decor


I used this drawer out of an auction-find chest of drawers (I made the rest of it into a wardrobe) and removed the knobs, painted it black and stood it up on the end.  I glued scrapbook letters and pictures, and lined the inside edges with some ribbon to match the room.  A really cute way to get all the "just arrived" info on display! And the top can be used to display other items.

Wednesday, January 1, 2014

Vintage-Look Lamp .


This was so fun to make! I had some leftover threaded lamp tubing I wanted to use, so I got a couple of boards about 6" square, drilled holes to accommodate the tubing and painted black. Then I decoupaged some scrapbook paper to each piece. I purchased a DIY lamp shade and adhered scrapbook paper with glue dots. I hot-glued some vintage pearl lace to the top and bottom of the shade. Then I began the assembly. I had an old suet cage I just slipped the tube through, and it moves freely. I cut out some scrapbook paper that looked like old postcards into similar-sized pieces and ran string through and tied on the suet cage. Put a couple of nuts on each side of the wood pieces to hold them in place and it was done!

Monday, November 18, 2013

Shabby Chic Picture Frame


I made several of these to display at my daughter's wedding.  I took an ordinary 8 x 10 frame, and painted it white, leaving a little of the wood color to show through.  Then dug through my craft box and found some vintage doilies, jewelry and lace and hot glued them around the edge.  For a really cool look, I went to www.photofunia.com and put personal photos into their selections of backgrounds and printed them out.  Really gave it a vintage feel.

Friday, November 1, 2013

Repurposed Serving Tray

This was a super-fun project!  I took an old metal serving tray I found at a yard sale, and masked off the center, painted it flat black.  Then I found an old picture frame with no picture or glass, and painted it flat black, and scruffed a little tan and cream paint around it for a shabby look.  I mounted the tray to the frame with some plastic conduit clips.  I purchased the letters, and decoupaged some coordinating scrapbook paper on them and glued magnets on their backs.  I had some really cool scrapbook paper that I cut out and burned the edges, glued to a piece of cardboard the same size, and glued a magnet to the back of it.  I hung this on a wall in my bathroom where I needed something not too bulky and it looks perfect!  This would also be a neat message center in a hallway or kitchen as well.

Friday, October 18, 2013

Shabby Chic Cupcake Holder

This is a great project for parties, weddings, etc.  I am always on the hunt for plates and cups of different sizes and styles at yard sales.  Most you can pick up for a very good price.  I used E6000 adhesive to glue the plates and cups together, letting each level sit for 24 hours before doing the next. We used these at my daughter's gender reveal party with cupcakes on them and they just looked adorable!  They are all three tiers, but made with different plates and cups, so it makes for a really interesting table display!